If you wear hearing aids, you’ve probably noticed that distance, background noise, and echoey rooms can still make listening hard, even with great technology in your ears.
That’s where remote microphone accessories (often called remote mics or partner mics) come in. They’re small, wireless tools that can make a huge difference in real-life listening.
Let’s walk through what they are, why they’re helpful, when to use them, and a few tips for getting the most out of yours.
What Is a Remote Microphone?
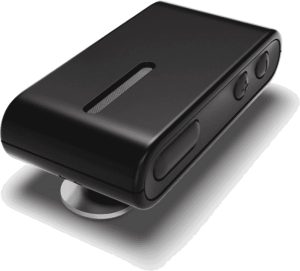
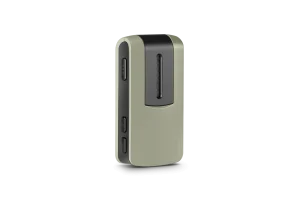
A remote microphone is a small, separate mic that sends sound directly to your hearing aids.
- Someone (like a partner, teacher, or coworker) wears or holds the mic
- The mic picks up their voice
- It wirelessly streams that sound straight into your hearing aids
Instead of your hearing aids having to “reach across the room” and fight through noise, the voice is captured up close and cleanly. The result: less listening effort and clearer speech.
You might also see terms like:
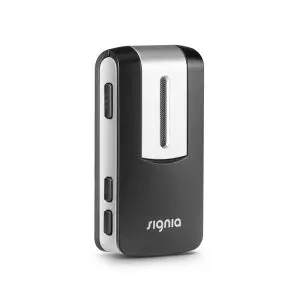
- Partner mic / clip-on mic: usually worn on a person’s shirt or collar
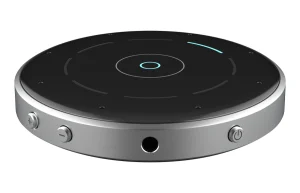
- Table mic: sits in the middle of a table and picks up multiple speakers
- Classroom / FM / Roger mic: used more in school or work settings, sometimes with extra features and range
They all share the same idea: get the microphone closer to what you want to hear.
Why Remote Mics Are So Helpful
Even the best hearing aids have limits. They work hardest in:
- Noise (restaurants, parties, busy offices)
- Distance (when someone is more than a few feet away)
- Reverberant spaces (gyms, churches, lecture halls)
A remote mic helps by:
- Improving the signal-to-noise ratio (SNR): That’s the fancy way of saying: more voice, less noise. When the mic is close to the speaker’s mouth, the voice is much stronger than the background sounds.
- Reducing listening fatigue: When sound is clearer, your brain doesn’t have to work as hard to fill in the gaps. Many people say remote mics make long meetings or nights out much less exhausting.
- Helping in situations hearing aids alone can’t fully fix: Hearing aids can’t break the laws of physics, distance and noise still matter. A remote mic does however help the distance problem by moving the mic right to the sound source.
Situations Where a Remote Mic Makes Life Easier
Here are some common real-world scenarios where a remote mic can shine:
1. Restaurants and Cafés
- Clip the mic on your companion’s shirt or place a table mic in the center.
- It focuses on the voices you care about instead of clanging dishes and chatter.
2. Work Meetings and Conferences
- Place a table mic in the middle of the conference table.
- In larger rooms or presentations, the speaker can wear the mic so you hear them clearly even from the back.
3. Classrooms and Lectures
- Teachers or professors can wear the mic on a lanyard or clip to their clothing.
- Great for students or adults in training courses, workshops, or large lecture halls.
4. Religious Services & Community Events
- Place the mic near the podium or on the person speaking.
- Helpful in echoey churches, gyms, or community centers.
5. One-on-One Conversations in the Car
- Clip the mic to your driver/passenger.
- Road noise, fans, and the fact that you’re facing forward all make hearing harder. Remote mics help cut through that.
6. Outdoors and On-the-Go
- Walking in the park, at the mall, or at a sports game.
- The mic helps you follow your partner’s voice, even when you’re not right next to each other.
How to Use a Remote Mic: Practical Tips
1. Mic Placement Matters
- Aim to place the mic 6–8 inches below the mouth (collar, lapel, lanyard) of the speaker you are wanting to hear.
- Sometimes we see users wearing the mic on themselves which usually causes annoyance with hearing their own voice and still not hearing their speaking partner well.
- Avoid covering it with scarves, hair, or jackets.
- Don’t let it rub against jewelry or fabric as that can cause annoying noise.
2. Watch Out for Background Noise
A remote mic will also pick up nearby noise. Help it out by:
- Asking the speaker not to play with it or fidget with papers near it
- Keeping it away from loud fans, open windows, or speakers
- In a group, consider using a table mic designed for multiple voices instead of a single clip-on
3. Charge It Regularly
- Get into the habit of charging it overnight, like a phone.
- Keep an eye on battery indicators so it doesn’t die halfway through a meeting.
4. Learn the Buttons and Lights
Spend a few minutes with your hearing care provider (or manual, online help videos, etc.) to learn:
- How to turn it on/off
- How to pair or reconnect it to your hearing aids
- What the different lights or beeps mean (pairing, muted, low battery, etc.)
A little practice up front prevents frustration later.
5. Talk About Mic Etiquette
Some people feel nervous wearing a mic at first.
You can say something simple like:
“This is a small microphone that streams your voice to my hearing aids so I can hear you more easily. It really helps in noise or at a distance.”
Most people are very willing once they understand it helps you.
And don’t forget to remind whoever is wearing the mic that even if they walk away from you, their voice will still be streamed directly to your hearing aids. We’ve heard some great patient stories of accidental eavesdropping!
6. Practice in Easy Situations First
- Try it at home or in a quiet environment so you get familiar with the sound.
- Then move to noisier or more challenging places.
Important: Brand Compatibility Isn’t Universal
One thing that may surprise or confuse some people when looking to purchase a remote mic: Remote microphones are usually only compatible with the same brand of hearing aids. You also have to careful to make sure the model of the hearing aids is compatible with the model of mic as technology changes and new remote mic and hearing aid releases can make things even more confusing!
That means:
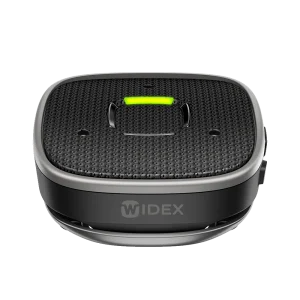
- A Widex remote mic generally works only with Widex hearing aids
- A ReSound mic will not connect directly to Starkey hearing aids
- Even within a brand, older models might not work with newer mics, and vice versa
There are exceptions (like some accessories that connect through neckloops, telecoils, or generic Bluetooth devices), but as a rule of thumb:
Think of remote mics like “matching sets” with your hearing aids.
What This Means for You
- When you’re choosing hearing aids, ask about:
- What remote mics are available
- How they connect
- How much they cost
- If you change hearing aid brands in the future, your old remote mic might not work with your new devices.
You can always check compatibility with your hearing care provider (or us!) before purchasing an accessory.
How to Get Started with a Remote Mic
If you’re curious whether a remote microphone could help you:
- Talk to your hearing specialist
- Ask if your current hearing aids support remote mics
- Ask which specific model works with your devices
- Describe your toughest situations
- “I struggle most in meetings / restaurants / church…”
- Your provider can recommend the right style of mic (clip-on vs. table vs. classroom style).
- Try it in real life
- Many people notice the benefit quickly in noisy or distant listening situations.
Final Thoughts
Remote microphones aren’t just fancy add-ons, they’re often the missing piece that makes hearing aids feel truly effective in the real world, especially in noise and at a distance.
Used well, they can:
- Make conversations clearer
- Reduce listening effort and fatigue
- Help you stay more engaged at work, school, and socially
If you’re doing “okay” with your hearing aids but still feel like you’re working too hard to hear, a remote mic might be exactly what you need!