Hearing Aid Filters
Let’s be honest. When you first got your hearing aids, your provider may not have given you a lecture on filters. You got your devices, a quick demo, maybe a handshake, and then you were out the door.
But then one day, your hearing aid starts sounding muffled. Distant. Like you’re listening to your audiologist through a sock. You panic and assume the worst…
Nine times out of ten? It’s the filter. A tiny, often overlooked, heroic little component that quietly sacrifices itself so your hearing aid doesn’t have to.
So… What Exactly Is a Hearing Aid Filter?
A hearing aid filter, also called a wax guard, wax filter, or cerumen filter (cerumen being the fancy word for earwax), is a small protective barrier that sits at the tip of your hearing aid’s receiver (the speaker end that goes into your ear canal).
Its job is simple: keep the gunk out.
“Gunk” in this context means:
- Earwax (the main villain)
- Moisture (sweat, humidity, the general dampness of being alive)
- Debris (dust, dead skin cells, etc.)
- Anything else your ear canal has decided to produce in protest
Without a filter standing guard, all of that lovely biological material would creep into the receiver, clog the speaker, and slowly but surely take down your hearing aids.
The Anatomy of a Filter
Filters are almost comically small. We’re talking about something that makes a sesame seed look substantial. Yet these microscopic mesh discs punch wildly above their weight class.
Most modern filters consist of:
- A fine mesh screen: physically blocks particles from passing through
- A hydrophobic (water-repelling) coating: repels moisture like a tiny invisible raincoat
- A housing or carrier: the little plastic cap that makes the filter snappable into place (and snappable out without requiring tweezers and a prayer)
They’re designed to let sound waves pass through freely while stopping everything else. Sound: welcome. Earwax: absolutely not.
Why Do Filters Matter So Much?
Here’s the thing about receivers in modern hearing aids: they’re marvels of engineering. They’re also astonishingly delicate. The internal components that convert electrical signals into sound vibrations can be damaged by a surprisingly small amount of moisture or wax buildup.
Consider the math:
- Quality receiver replacement can cost $100–$300
- Pack of replacement filters costs $5–$15
- Changing a filter takes about 30 seconds
The wax filter is, in short, the cheapest, most effective form of hearing aid insurance you’ll ever buy.
Types of Hearing Aid Filters
Not all filters are created equal, or even interchangeable. This is an important point that many people discover only after ordering the wrong type online and spending 20 minutes trying to force a square peg into a round hole. Contact us if you need some help.
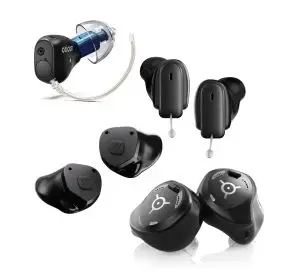
1. Branded Proprietary Filters
Major hearing aid manufacturers such as Phonak and Unitron, Oticon, Signia, ReSound, Widex, Starkey, each make their own filters designed specifically for their receivers. These are sometimes called HF3, NanoFilters, or ProWax, depending on the brand. They’re not interchangeable across brands. Your Phonak filter will not fit in an Oticon receiver.
2. Aftermarket / Universal Filters
Third-party manufacturers produce filters that fit a range of devices. These can be cost-effective, but check compatibility carefully. When in doubt, your audiologist is a better resource than a random Amazon listing with 47 conflicting reviews.
3. Behind-the-Ear (BTE) Tubing Guards
Traditional BTE hearing aids with earmolds use a different system, acoustic tubing that connects the aid to the ear. These have their own moisture traps and filters, typically found in the earhook or tubing connectors. The concept is the same (keep gunk out), just in a different physical location.
How Do You Know When to Change Your Filter?
Your hearing aid has several ways of telling you the filter needs changing. None of them are subtle.
- Sound is muffled or reduced: like someone put a tiny pillow over your speaker
- Volume seems lower than usual: and turning it up doesn’t help (because the problem isn’t the amplifier, it’s the blocked exit)
- Your aid cuts in and out intermittently: a filter fighting for its life
- The aid seems completely dead: before you panic and call your audiologist, change the filter. You might be amazed.
- Visible discoloration or debris on the filter: this one’s self-explanatory. If it looks horrifying, it’s time.
General rule of thumb: replace your filter every 1–3 months, or whenever you notice a performance change. If you produce a lot of earwax (no shame, some people just do), you may need to replace more frequently, perhaps every few weeks.
How to Change a Hearing Aid Filter
Good news: changing a filter is genuinely one of the easier maintenance tasks in all of personal healthcare.
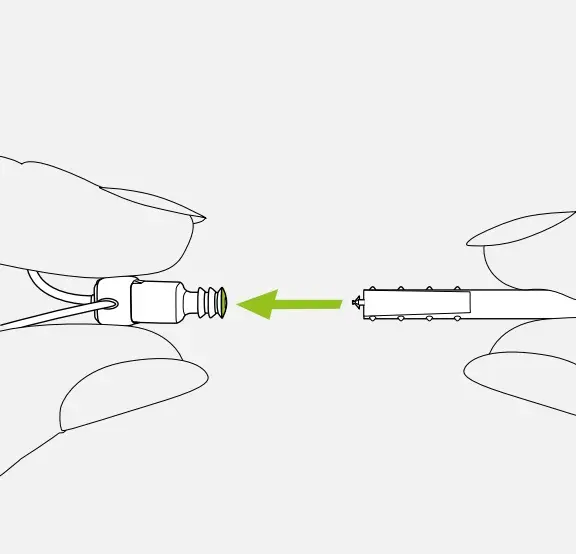
Most filter systems use a two-ended tool that looks like a tiny stylus:
- One end has a pin to extract the old, spent filter
- The other end holds the fresh filter, ready to be inserted
The steps:
- Remove the dome/ear tip off the end of your receiver (If you use a custom earmold, there is no need to remove it!)
- Hold your hearing aid with the receiver tip visible
- Insert the pin end of the tool into the old filter and pull it out (it will come with it)
- Flip the tool to the filter end and press it firmly into the port until it clicks
- Remove the tool — the new filter stays in. Done.
If you find this difficult due to dexterity or vision challenges, your hearing care provider can do it for you!
A Note on Wax:
Your Ear is Just Doing Its Job
Earwax gets a bad reputation. People act embarrassed about it, as if their ears are misbehaving. But cerumen is actually a sign of a healthy ear. It’s antimicrobial, water-repelling, and self-cleaning. Your ear canal sheds earwax naturally as part of its maintenance cycle.
The issue is that hearing aids sit right in the middle of this system. They interrupt the natural outward migration of wax, and they create a warm, slightly humid micro-environment that earwax finds very cozy.
So your filter isn’t fighting a problem. It’s managing a natural process. Don’t be embarrassed about needing to change your filter frequently, it just means your ears are enthusiastic.
The Bottom Line
Hearing aid filters are small. They’re cheap. They’re easy to change. And they are arguably the single most important maintenance habit you can develop as a hearing aid wearer.
Check your filter when your hearing aid sounds off before you assume something expensive is broken. Keep a supply on hand. Change them regularly. And appreciate the sheer audacity of a component smaller than your pinky nail that keeps a thousand-dollar device working reliably, day in and day out.